Mechanical Marvel - Understanding Textures & Maps in Maya
Mechanical Marvel - Understanding Textures & Maps in Maya
- In this lesson as part of better understanding Maya and modelling in order to create as realistic of models as we possibly could, we had to understand textures and map-types for Maya. Chris tasked us with answering a set of questions in relation to what, how and why we use certain maps for textures.


- This is my raw .TGA file of the bump map I'll use in Maya. This is to show & teach us how to use bump maps in Maya which are essentially maps that identify and exhibit bumps, or bevels and work with materials such as Blinn to show use of light and shadow.

- This is the colour/diffuse map this is really what the title says, it uses light, environment and material assets to show different uses and examples of light. Depending on the colour, angle and use of light on the diffuse map. It of course also allows you to show light on a model.

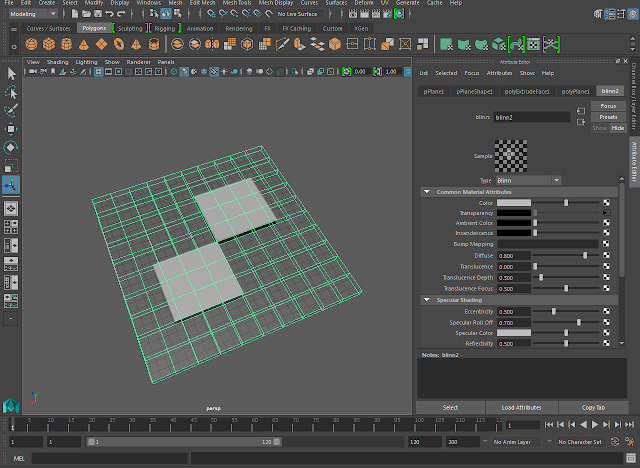
- This is a transparency map. This literally just enables you to make an area of a full model transparent. You can make individual assets transparent but not sections. This map allows you to do that. Depending on how the colours are laid out and on what polygon too.

- This is a specular map. Specular maps are like reflective materials but reflective materials just mirror the environment around them and don't have any realism or use of light at all. Specular maps keep that mirror-like effect but also use light and reflect the environment around it.
Testing these out in Maya
- Here is the diffuse map in Maya. I took a flat rectangle and from this assigned a blinn material and from there in the colour and/or diffuse open opened the .TGA file of my diffuse map. This is the first example of colour I've used in Maya.
- Here is the diffuse map that has then been bump mapped in Photoshop and following the same method, brought into Maya with a blinn material which emphasizes the lighting effects on a bump map and allows you to truly see how this comes into use for games/film.
- Here is the specular map in Maya, as you can see from certain angles the light hits the coloured areas better than the standalone blinn. Reason being is because of the reflective properties specular maps have by default. At other angles the shadows are shown, which unlike blinn materials or reflective maps where they don't capture both light and shadow.
- Transparency maps basically make the darkest colour on your TGA file translucent, so depending on what colours/shades you pick depends on what will be transparent. Here you can see the actual polygon is a full square, but all you can see is the two squares which in the TGA where initially white. As mentioned, the lightest colours will be opaque and the darkest ones will not be. You can alter colours so that colour is actually visible on the parts you want.
- As you can tell from this side perspective you can see it still keeps the polygons original properties, as in it isn't entirely transparent and only seems to be from a perspective or angle which is good. Because the means it is perspective-specific. Which I could utilize for my final model very well, I feel. But I'll have to practice more. As with all of these maps.


No comments:
Post a Comment