Wednesday, 25 May 2016

Final Major Project - Evaluation


Evaluation - Final Major Project - Connor Byrne


The name of my project was ‘Wastelands’ and I did a digital concept of a wasteland environment. Throughout the design process my designs had only developed slightly and that was through the core art skills I improved such as placement, perspective and composition. My early designs were very bland and basic with not much depth to them. But since learning those art skills my designs got massively better.

In terms of reference material I found a average amount of reference material. I felt as if I could have found a lot more given my project was an environment I could have gotten a lot more primary source material such as photos or books. However, I did get both of these material sources. All the reference material I found wasn’t really that effective or useful apart from a photography book Shiam showed me.

My research heavily helped and informed both my 2D and 3D skill development because throughout the design process I was constantly referring to my research to reinforce the core art skills that would help me achieve the end result that I did. For example, whilst designing my developed concepts I wasn’t sure of where to place the sub dominant forms and had to refer back to my composition research to remind myself.

That was one example of where my research informed my skill development.

No art movements or cultures really affected or influenced my design work. The only influence for my artwork were the two artists I referenced in my artist research who were Kris Piotrowski and Olly Moss.

Both Kris and Olly use the same art style and stick to the digital mediums of Photoshop and Illustrator.

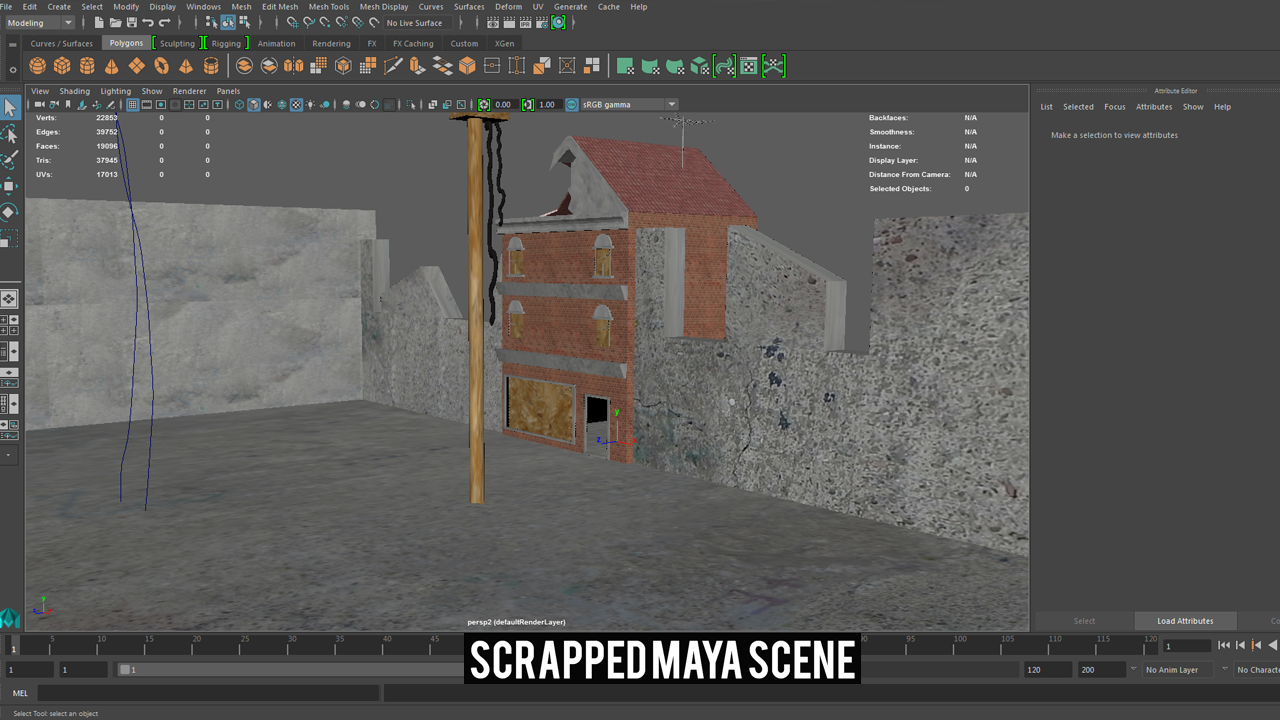
Throughout my project I stuck to a digital medium using Photoshop and Maya. Photoshop was for my 2D artwork and some of the miscellaneous tasks for 3D work as well, and Maya was also for my 3D work.

The main techniques I employed both for my 3D and 2D were the core art skills I developed throughout my early design process. For example, placement and perspective were constant techniques I needed to apply when modelling, additionally composition, perspective and placement were techniques I had to ensure I used throughout my 2D work since this my environment concept art relied on it heavily.

My work was pretty much consistent throughout. My 2D work changed quite a lot due to my use with formal elements of art and the core art skills I was practicing and developing throughout this project.

I wished I looked a more primary sources as this would have help me a lot more with my 3D work. For example I redesigned the windows on my model three times and with enough primary source photos I could have had a more consistent and solid design, first time. So I do wish I investigated further, yes.

My 2D work has been structured on formal elements of art like tone, shape and line.

The visual language I used was in the colour palette and lighting. I kept it quite grungy and almost dirty looking. The reason I went with this is because I wanted to convey the look of aged, weathered, ruined etc.

Overall I am more than happy with my final piece. I felt as though there are areas I could have made a little better such as the 3D work and a few parts of the 2D work but none the less, I am happy, yes.

I am particularly proud of my 2D final piece. Reason being is I enjoyed the process from start to finish and really felt as though I developed my skills as artist and let that shine throughout this piece of work.

If I could change anything it would be my planning for the 3D work. I really do feel as though this let down the end result for my model. Although it is good, it did not seem nearly as good to me as my 2D work.  

Final Major Project - Exhibition (A1 Plan)


Final Major Project - Exhibition (A1 Plan)


To get ready for my exhibition I needed too come up with a plan on how to divide and use my provided A1 board. So, here is my A1 board plan and how I plan to set it all out.


What pieces of work and where they will be placed is yet to be decided.

Final Major Project - Final Product and Overview


Final Major Project - Final Product and Overview


After making all necessary changes and fixes to my work, I had finished my wishlist project goal of modelling and asset from my final concept piece. This was a fully textured model built in Maya and then imported and tested in the Unreal game engine, of which it worked.

Here are some of the screenshots both in Maya and in Unreal.

Here are the Maya renders (ambient lighting).


 Here are the screenshots I took of the model once I imported it into Unreal engine.


Tuesday, 24 May 2016

Final Major Project - Scene Composition (Scrapped Idea)

Final Major Project - Scene Composition (Scrapped Idea)


One recommendation Chris suggested that rather than just having the building only that I construct the scene around it, as seen in my final concept piece. What I did was simply construct whatever was going to be seen in the render region to be accurate to the final concept piece.

All that would be in this render region would be the main building, surrounding walls and cables.

Since all of this is basic cube polygons that have been transformed accordingly, it didn't take too long nor was it massively difficult. However, I knew there was a lot of work ahead of me and having only one more week until deadline I decided I did NOT want to model the entire scene.

I made this decision because I knew I'd have changes and fixes to do and didn't want to overload myself with additional modelling and run the risk of not completing work fully.

However I here are screenshots of the scene I managed to compose.


This was the scene I had constructed but did NOT want to carry on with because I was worried that the rest of my work would suffer. Additionally, I was content with the main building I made.

This is a screenshot of the scene with the textures added.


Thursday, 12 May 2016

Final Major Project - Experimenting & Further Development (Window Design)


Final Major Project - Experimenting & Further Development (Window Design)


After importing my model into unreal there were a few things that I wanted to change. One of which was the windows and door. Not so much the design but in unreal the windows and door are completely transparent, of which they should not be. So, what I needed to do is board them up and experiment with textures to decide which one would best suit my model.

So what I did was model three different window boards or blocking to add to the theme of it. 

I decided I was going to model chipboard, perforated metal and wooden planks behind the windows.

Here are the three variants I made in Maya, ready for unreal.


Once I had all of these models ready for unreal, I simply repeated the same process as before where I will go to file>export selection (highlight entire model)>unreal project folder. And after building all the lighting scenes here are the models in unreal engine.

Here is the perforated metal re-design.

 Here is the boarded/wooden plank re-design.


Here is the chipboard re-design.


From here I will fix any issues remaining with the model in both Maya and Unreal. Once this is all done and finalized I'll take screenshots and renders of the final product and then proceed onto the last few steps of the project such as evaluation, making any changes/fixes etc.


Monday, 9 May 2016

Final Major Project - Object Details, Settings and Material/Texture Settings


Final Major Project - Object Details, Settings and Material/Texture Settings


Now I have fixed my model in unreal, I decided I would look into settings for lighting and material/texture settings. So this was all experimental and kind of having fun with the settings.


Here is the mesh attributes and the settings I used.


Here is a progression (gif) of all the values I went through as part of the brick texture.

Here is a progression (gif) of all the values I went through as part of the brick texture.

Final Major Project - Fixing Roof (faces) After Importing to Unreal


Final Major Project - Fixing Roof (faces) After Importing to Unreal


Once I imported my model into unreal there were a few issues with the model itself. One major issue was one visible side of my roof had reversed faces meaning in unreal, you could not see them at all.

Here is a screenshot of the issue...


After going back into Maya and looking over the roof, I found out that it was simply just reversed faces and wasn't and issue with the depth of extrusion. So I went to Mesh Display>Normals>Reverse and that ended up fixing the issue I had with these faces.


Here are the settings for the reverse face(s) option in Maya.


Here are the faces fully reversed.


Here is me reimporting the model using unreal.


Here is the model fully reimported.


Wednesday, 4 May 2016

Final Major Project - Preparing Lightmaps for Unreal Engine


Final Major Project - Preparing Lightmaps for Unreal Engine


Now that my model is UV'd and textured before I bring it into unreal I need to generate light maps for all objects on my model. How I did this was simple, each light map needs to be in the 0 to 1 square box provided. Not like texture maps which are scaled to size.

So, what I did was went to my UV Set editor and copied the current map and made the large texture scale fit to that 0 to 1 box. Since this has been done on a copy of the original map the textures are not affected. From here I need to export my model out of Maya and import it into an unreal scene.

Here is the same UV set editor but with the selected copy (light map) highlighted.


Now I need to import my model into unreal. Firstly, export my model as an .fbx file.


Firstly I created a project directory and then imported my model with the correct .fbx settings.


Tuesday, 3 May 2016

Final Major Project - Creating Textures, Applying Normal, Specular and Colour Maps to Model


Final Major Project - Creating Textures, Applying Normal, Specular and Colour Maps to Model


Now that I had UV'd my model, I needed to texture. An issue I came across was any texture I applied (brick especially) created this almost tiled effect and showed the seams and edges of the image so that it didn't look good nor realistic when I scaled it to size on my building. So I asked for Chris' help.

Here is what the texture looked like originally (edges and seams visible).


'
As you can see when I apply the texture directly you can see the same pattern over and over, as though it has almost been tiled. So, I needed to take this into Photoshop and make it edgeless.

I start out by going into Photoshop and creating a computer square (1024, 2048, 4064) [1024].


After this I imported and sized the brick texture to these dimensions and from there went to filters>offset which allows me to recreate this 'tiled' effect so I can start fixing those edges and seams and make them unnoticeable. This is something I'll do with the duplicate and feather tool.


Once I fixed and hid all of those edges by selecting specific parts of the brick (cement lining) and feathering/erasing any edges that hang over or don't follow the pattern, I had a edgeless texture.


Here is what the edgeless texture looked like when I exported it as a .TGA file and applied it.


The last thing I need to do is to set the rest of the textures to the appropriate parts of the model.

Here is my model once all textures were applied. One change I made was I re-created the two ledges that separate the two floors. The smooth, bevelled edges didn't fix the design well, so I changed it.


What was left to do was to add all maps onto the textures (colour, specular and normal). Firstly I needed to create the normal maps which I did using XNormal. Here is the screenshot.


I repeated this process for all of the textures I was using on my model.

For specular maps I took each texture into Photoshop and lowered the brightness and for some of the textures I would invert them. Then simply added these into the material attributes.

Here is the fully textured model (specular, normal and colour).


 Here is the progression (gif).


Final Major Project - UV'ing My Model


Final Major Project - UV'ing My Model


Now that everything has had the changes needed, it was ready to be UV'd. UV'ing is a way of converting a 3D object into a 2D one by unfolding and laying it out flat. I did this by going to my UV editor and then selecting the object I want to UV. I did this section-by-section and not all at once.

UV was something I always found difficult so I turned to Chris to show me a lot of the basics such as transform tools while in the UV window, cutting, moving and sewing seams together.

I always referred to a video made by James Taylor on YouTube. That can be found here.

I started off with the roof since that was the most complex with the multi-cuts and drastic mesh changes I had already made to it. So, what I did was select the roof and then go to my UV editor. From here, I needed to unfold the UV's so I can start cutting and sewing whatever edges needed.

Here is what my roof looked like prior to UV mapping it correctly.


As you can see from the UV editor everything is scrambled since Maya will unfold it in the most random way possible. So, what I will do is highlight the correct edges by right-click>edges and then finding the correct edges which I will then move and sew by shift+right-click>move and sew.

After doing this for an entire day, I finally got it done. Here is what my roof looks like UV'd.


As you can see, it is a whole lot more clearer and neatly layed out. The importance of this is so that when I texture my roof and building non of the textures are distorted. One way of checking this is by downloading a grid texture and then applying it. The grid will allow you to notice any distortion.

This is the before and after UV with the grid texture applied.


Here is the texture applied after UV'ing the model.


As you can see when I UV'd it properly, there is no stretching or skewing of the texture.

From here I repeated this process for each segment of the building. Which from here would allow me to texture it freely now. If after texturing there are any extras to add then I will.