Saturday, 30 April 2016

Final Major Project - Final Major Project - Making Final Changes and Prepping for UV and Texturing


Final Major Project - Making Final Changes and Prepping for UV and Texturing


At this stage of my work I have the model as close to the original as I could get. With all of this and the basic shape and detailing done I need to make all amendments and fixtures to the model now so that it is ready to be UV and textured. This includes visual updates, remodelled areas and any additional features/assets. So what I will need to do record and make those changes now.

Updated Windows

I decided I wanted to update the windows on the model. Although the ones I originally modelled were fine, they just didn't look appealing and overall it felt as though it ruined the model. 

Here were the original windows...


I redesigned them keeping the placement of them but changing the actual look of them to something more... realistic and visually appealing. So I took some primary source photos and use all of them. 

Here are the updated windows...


Here is the newer and more updated version of the windows.

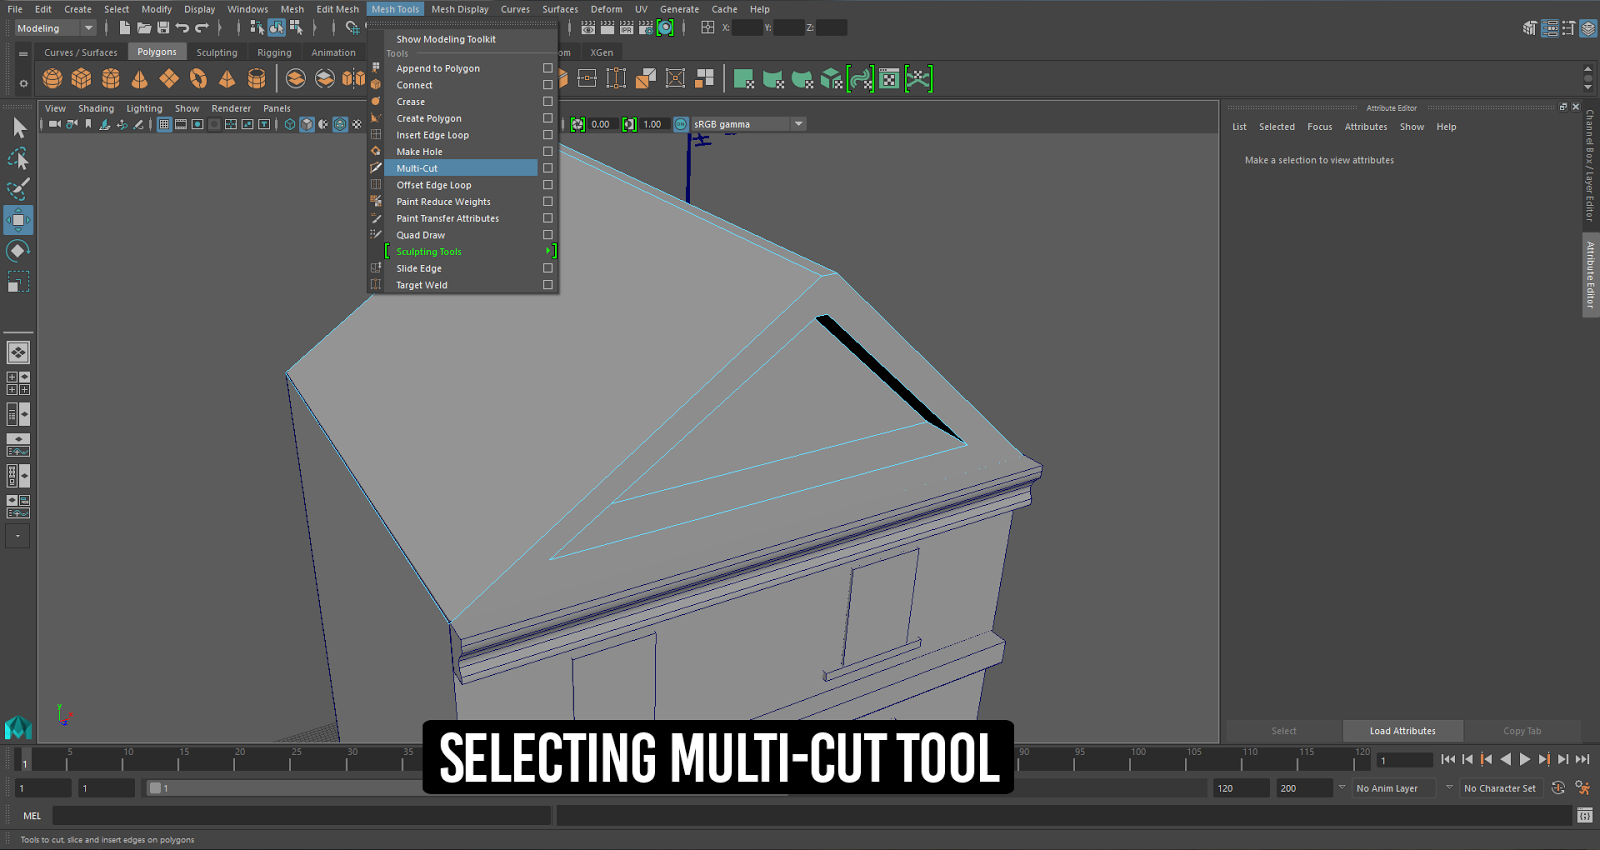
UV preparations (Triangulating and Fixing Geometry)

So I can texture and have a working low-poly (low polygon) model I needed to ensure that Maya and Unreal can triangulate my model properly for game-use. How I would do this is by making sure that my model has appropriate face (cuts) so the model can be triangulated for game-use.

So I looked over the areas I already cut into faces but there was an issue with mine, and that was that I'd cut the faces into quads (four-sided faces) which isn't really suitable for game-use but more to be exported then modelled onto in something like Mudbox or ZBrush which makes more use of them.

Here is my the roof of my model in which I cut into quads...


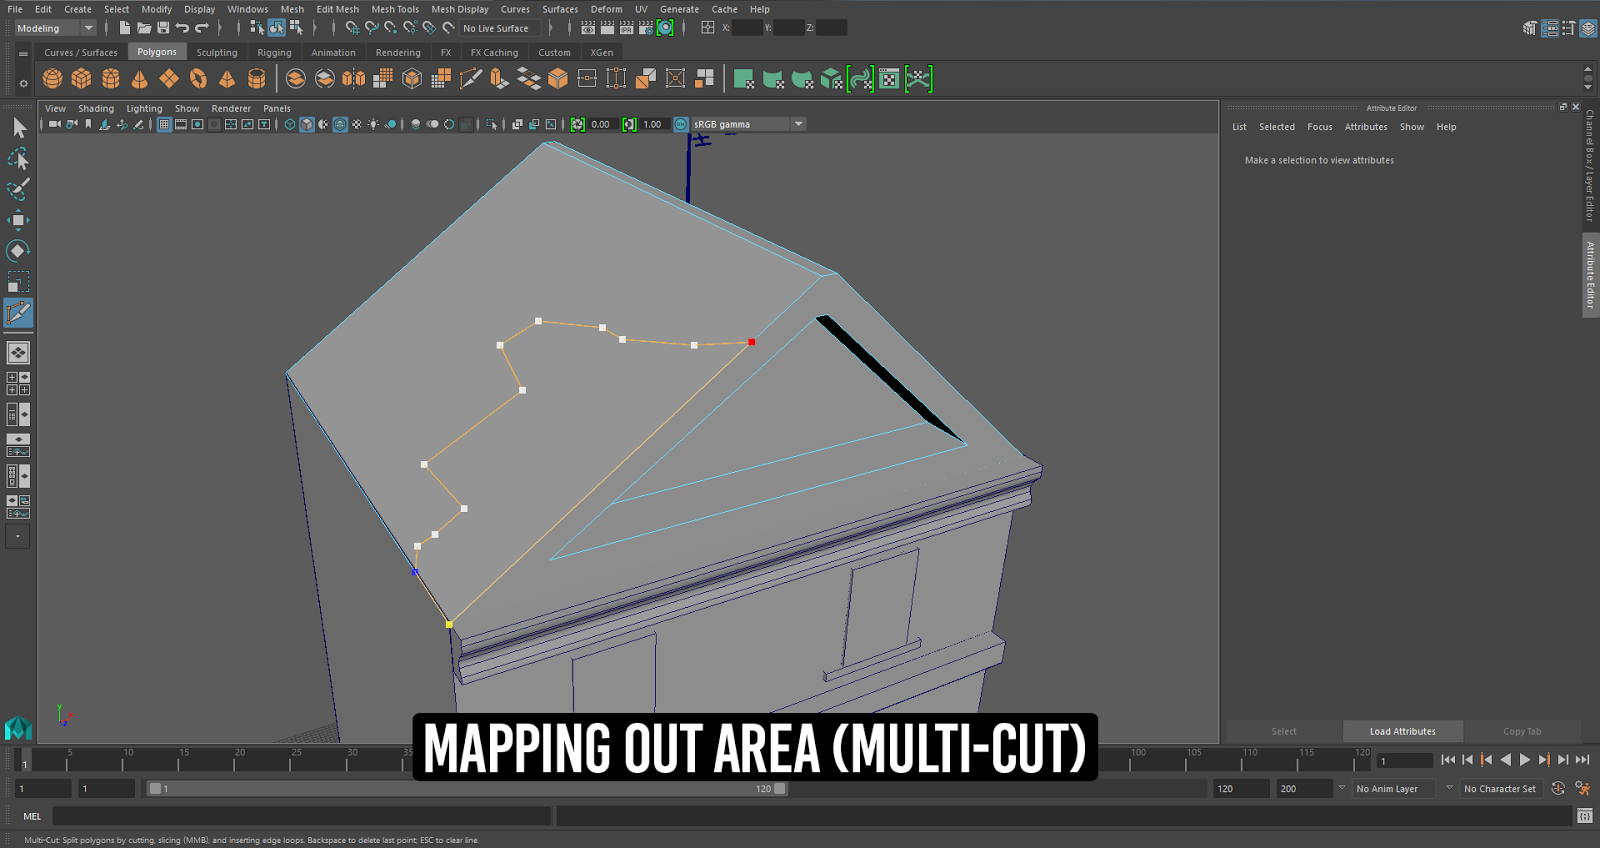
Another issue with this is that edges aren't aligning at all either. Which is why I need to re-cut all of the faces but before that I needed to make sure there was no overlapping faces, or vertices. I knew if I deleted the edges and left the vertices I couldn't cut properly because Maya would still register them.

So I went through and fixed the unaligned edges.


After all unaligned edges were fixed and the vertices were removed too I just need to re-cut all of the faces which wouldn't take long at all and I just needed to ensure it could be triangulated.

 Since this is a low-poly model, I need the least amount of faces as I can get. Chris showed me how to display my polycount so that whilst I am working I can keep track of them.

I used Maya's built-in triangulation setting on my quad-cut roof and I had 136 tris.

Although this was suitable for game-use it was alot more than I needed. So what I did was remove all quads I cut on the roof and triangulated it myself and use the built-in triangulation to see how many more tris Maya could put in their. Which turned out to be 60 tris. Which is overall alot better.

Here is the original roof, quad-cut faces and then triangulated with Maya (136 tris).


Here is when I re-cut the faces and tried to triangulate and then triangulated using Maya (60 tris).


For the base of the building I caused some issues when I cut the doorway out. This created a UV I couldn't navigate nor fix. So, to save time I simply deleted the base and created a new cube polygon. This was ideal since it doesn't need to be UV'd since it is a basic cube net when unfolded.

After this I re-designed the front window and doorway by outlining the shape of the window and doorway with cube polygons I transformed into rectangular polygons. This would not only save time but also avoid further issues for UV'ing and texturing later onward.

Here is the old and new designs of the front window and doorway.


Tuesday, 19 April 2016

Final Major Project - Unit 9 Communication and Presentation Survey


Final Major Project - Unit 9 Communication and Presentation Survey


Shiam wanted us to complete a presentation survey, here is mine.


Monday, 18 April 2016

Final Major Project - Fixing Ambient Render Settings & Progress Render (Test)


Final Major Project - Fixing Ambient Render Settings & Progress Render (Test)


I needed to do a practice render in ambient lighting but whenever I did the render was grainy and far too bright, kind of like white noise. I didn't really understand what was going wrong so after some help from Chris we found out the issue and fixed the ambient render settings.

Here is the screenshots before (not working)


Here is the screenshots after (working)


And the reason I wanted to render this out was to see what this would look like with ambient occlusion added and that is how I came across the issue. Below are the two final renders.


Saturday, 16 April 2016

Final Major Project - Shattering The Roof


Final Major Project - Shattering The Roof


As part of the original concept, one half (left-side) of the roof is shattered and cracked. Of course this is a massive visual element I need to replicate onto the model. Not know how to I spoke to Chris and he showed me the Multi-cut tool. This let's you snap to an edge and freely select the area on a face. 


Here is me selecting the multi-cut tool in the mesh tools panel. 


Here is the area I mapped out on the face, ready to be deleted.

Here is the roof shattered from the area I mapped out.


The ledge also needed to be shattered. So, following the pattern of where the roof is shattered I set out another multi-cut map and removed the needed area on the ledge and deleted it.

After setting the persp camera to one that one close to the concept art, I achieved the look needed.

Here is the side by side comparison...


Final Major Project - Fixing 'flickering' On Extruded Walls


Final Major Project - Fixing 'flickering' On Extruded Walls


The top roof/tower of the building has some flickering as does the windows below. I wasn't entirely sure on how to fix this so I looked on some forums and found half a solution. 

The first solution was changing the persp camera settings. By default, the near clipping value was set to something low like 0.010 so I tampered with the settings and set it to 100.0 which fixed all flickering for the windows. However, it did not fix the flickering for the roof/tower.


Here are the screenshots of the camera settings and the changes before and after...


Here are the settings and change after...


As mentioned this did not fix them all. The roof where I extruded the front face inward had this flickering effect equal to the distance I extruded. What I found out was this face was too close and thin to the actual top-surface that this is what was causing the flickering.

What I did to fix this was scaled the front face down in size and then extrude it. This did work. Here are the following screenshots of the process I went through for fixing this effect.

As you can see it is far to close to the roof's face that it is causing this flicker.

 Here is the same face, scaled-down so that it isn't to close and the faces are overlapping.


And finally, you can see there is NO flicker at all. What I was most pleased about with this is that this method got me closer to my original concept look than before.

Thursday, 14 April 2016

Final Major Project - Additional Details and Basic Form


Final Major Project - Additional Details and Basic Form

From here just as a basic, I added rough outlines of the doors and windows of which I could add more detail into later. As of right now I just needed some basic shapes to better understand the size of it. From there I would add the roof, and touch-up on any details that are needed.


From here I needed to add the roof. All I did was take a square polygon and shape it to the building.


What I did next was using the edge selection tool took both adjacent edges and using the move tool drew them closer together for the outline of the roof. I had to do this one-by-one.


Next I selected the front face of the roof and using the extrude tool dragged the front face in.


From here as part of the concept design there was an antenna/TV satellite of which I needed to add. So after duplicating various cylinder polygons until it shaped the antenna. It took me a few different tries and attempts but this is the antenna I came up with for the building.


I then went around and altered any edges and faces that had been overhanging and extruded the main bottom door inward. I realised that the door was level with the main wall which I did not want.

 Lastly, as with the previous step I went through and polished everything over and resized all of the buildings, features and assets so that they were accurate to the original concept art of which it was.


Sunday, 10 April 2016

Final Major Project - Bottom Ledge (Adding The Ledge and Taper)


Final Major Project - Bottom Ledge (Adding The Ledge and Taper)


As part of the concept, the building has a second, lower ledge which of course I needed to add. I started this by getting a normal polygon cube, and sizing it equally to the top ledge. I kept it really easy, simple and light since the bottom ledge doesn't have the 'indent/wave' effect like the top.


As a way of getting the length accurate and remove any excess faces I inserted an edge loop where I wanted to cut off the ledge and selected the surrounding edges to then shift> right-click> fill hole. I do this only because it is alot quicker than tediously scaling and shortening it.


Above is the screenshots for the sizing scaling, edge looping and face removal for the ledge so that it is ready to be lowered into position and have the final taper added onto it. 


Here is the base shape of the ledge put into the final position ready to have the taper added.

For adding the taper, I made a slimmer duplicate of the base ledge and from there selected the bottom, front-facing edge and dragged that so it is inverted or at a slant/diagonal position. Here are the screenshots of the following process. I may need to alter and change this later.

This is the base of the taper. All I did was duplicate the ledge and reduced the height.


Here is the taper being adjusted by selecting the bottom, front-facing edge and using the move tool to drag it inward so that it gives the slanting, tapered look of a ledge.

Below is the highlight face I selected and dragged inward to create this effect.


Above is a screenshot of the finished taper of the bottom ledge. As mentioned I may go back and change some things later on but I am pleased with it as of right now.

The next step is to add the surrounding windows, doors and frames to them.